
Get ready to smoke out your eyes!
Hey there beauty enthusiasts, today I’m going to walk you through the steps to achieving the classic smokey eye look. Are you ready to add some drama to your evening makeup routine? Then let’s get started!
First things first, let’s define what we mean by a smokey eye look. This iconic look typically involves using dark, smudged eyeshadow to create a sexy and sultry effect. It’s a great way to add some intensity to your eyes and elevate any outfit for a night out on the town.
So, why wear a smokey eye look? Well, for starters, it’s a timeless and versatile style that works with a wide range of makeup colors and clothing styles. It can be a subtle addition to a daytime look or a bold statement for a fancy event. Plus, it draws attention to your eyes and can enhance the natural shape and color of your irises. Who doesn’t love that?
Prep Yo’ Face: Gettin’ Ready for the Smokey Eye Look
Before I start creating my smokey eye look, I always make sure to prepare my face properly. It’s important to have a smooth and even base to work with, so that my eyeshadow can really pop. Here are my tips for preparing your face:
Applying Primer
One of the most important steps in preparing the face for a smokey eye is applying a good eyeshadow primer. This will help the eyeshadow stay in place, prevent creasing, and intensify the color. I like to apply a small amount of primer all over my eyelids using my finger, gently blending it in.
If you have any blemishes, dark circles, or other imperfections on your face, it’s important to cover them up before starting your smokey eye. I like to use a concealer that matches my skin tone and blend it in with a makeup sponge or my finger. Make sure to blend it outwards towards the edges of your face to avoid harsh lines.
Setting the Base with Foundation and Powder
After applying primer and concealer, I like to apply a layer of foundation all over my face to even out my skin tone. I prefer using a light and buildable foundation, so I can adjust the coverage as needed. Once I have applied my foundation, I like to set it with a translucent powder to prevent shine and keep it in place throughout the day.
Getting Smokey: Creating the Perfect Smokey Eye
Now comes the fun part, creating the smokey eye look! This is where you get to experiment with different shades of eyeshadow and create a sultry, dramatic look that will have heads turning. Here’s a step-by-step guide to creating the perfect smokey eye look:
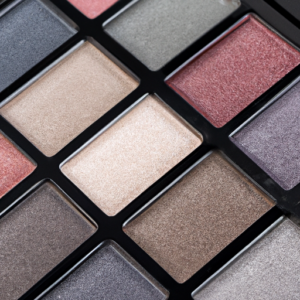
Choose the Right Eyeshadow Colors
When it comes to choosing eyeshadow colors for a smokey eye look, you want to go for shades that are darker and complement each other. Classic colors like black, grey, brown, and bronze are safe bets, but you can experiment with other colors too. A good rule of thumb is to choose a lighter color for the base, a medium color for the crease, and a darker color for the outer corner of your eye.
Applying the Eyeshadow
Start by applying the lighter shade of eyeshadow to the base of your lid. Then, use a medium shade and apply it to the crease, blending it upwards and outwards. Next, take the darker shade of eyeshadow and apply it to the outer corner of your lid, blending it inward towards the crease. Keep blending until the colors are seamless and there are no harsh lines.
Blending and Smudging
Blending is key when it comes to creating a smokey eye look. Take a clean, fluffy blending brush and blend out any harsh lines between the shades. You can also use a smudge brush to blend the eyeshadow along your lower lash line for a more intense look. For an even more sultry look, use a bit of black eyeshadow and blend it along your upper lash line.
Completing the Look with Mascara and Eyeliner
Once you’re done blending and smudging, it’s time to complete the look with mascara and eyeliner. Use a black or dark brown eyeliner along your upper lash line and waterline. Then, apply several coats of mascara to both your upper and lower lashes. For an even more dramatic look, you can add false lashes too.
Finishing Touches
Finish off the look by applying a bit of blush to the apples of your cheeks, and a highlighter to your cheekbones and brow bone. For the lips, you can go for a nude or natural-looking color or a bold, dark shade, depending on your preference. Remember that the focus should be on your eyes, so keep the rest of your makeup understated.
Creating a smokey eye look takes practice, but with these simple steps, you’ll have the perfect look in no time!
Final Touches to Perfect that Smokey Eye Look
Once you’ve achieved the perfect smokey eye, there are a few finishing touches you can add to bring the look together. These final steps will ensure your look is complete and polished, ready for any occasion.
Applying Blush
Blush is an essential component of any makeup look, and the smokey eye is no different. A soft touch of blush on the cheekbones will add a healthy glow to the skin. Choose a shade that complements your skin tone, and apply it by lightly sweeping it across the top of your cheekbones in a circular motion. Be sure to blend well to avoid harsh lines.
Adding Highlighter
To enhance your look even further, apply some highlighter to the high points of your face, such as the tops of your cheekbones, the bridge of your nose, and your cupid’s bow. This will give your skin a luminous, dewy look that will beautifully complement your smokey eyes. Be sure to use a light hand when applying the highlighter, building up the intensity gradually
Selecting the Right Lip Color
Choosing the perfect lip color to complement your smokey eye is essential. You can go for a bold, statement lip, or opt for a more neutral shade to let your eyes do the talking. If you’re going for a bold lip, select a shade that complements the color of your smokey eye but doesn’t clash with it. If you’re choosing a neutral shade, go for something that complements your skin tone and won’t compete with your eye makeup.
These final touches will have you looking and feeling your best, with a polished and complete makeup look that is perfect for any occasion.
5. Conclusion – I Finally Nailed the Classic Smokey Eye Look!
After countless tries and tribulations, I have finally perfected the classic smokey eye look! It took me a while to get the technique down and find the perfect eyeshadow colors, but I can confidently say that I am now a smokey eye expert.
Thanks to the guidance from besteyelashextensionsupplies.com, I was able to prepare my face properly, choose the right eyeshadow colors, and apply them with ease. The key was to blend and smudge everything to create that dramatic effect, which really made my eyes stand out.
One thing I learned is that everyone’s eye shape and size are different, so it’s crucial to experiment and find what works best for you. Starting with a good primer, concealer, and foundation is also important to make your eyeshadow last longer and look more vibrant.
Finishing off the look with some blush, highlighter, and the right lip color completes the overall appearance. Although the smokey eye look may seem intimidating at first, with some practice and patience, anyone can master it.
So, if you’re looking to try something new and daring, I highly recommend giving the classic smokey eye look a go. Trust me, with these steps, you’ll look like a natural in no time.