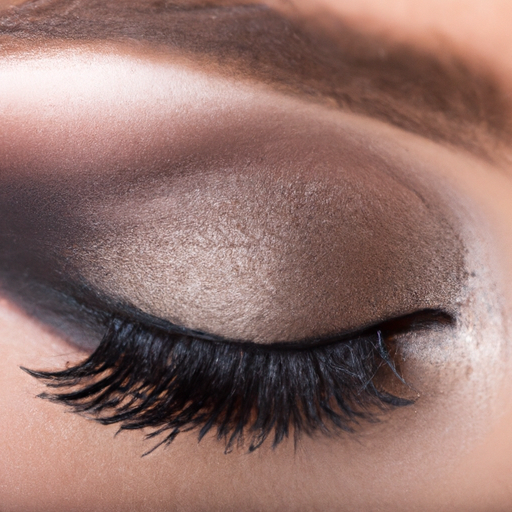
Hey there! Get ready to master the sultry smoky eye look in just four easy steps!
What’s up, fellow makeup enthusiasts! Have you always been intimidated by the smoky eye look? Fear not, as I’m about to guide you through the process of creating a stunning smoky eye with a few simple steps.
But first, let me tell you a little bit about myself. I’ve been experimenting with makeup for years and have finally mastered the art of the smoky eye. It’s a versatile look that can be worn for any occasion, and I’m excited to share my tips and tricks with you.
So sit tight and let’s get started on creating that sultry smoky eye!
Here’s What You Need to Get Started
Before you can create a stunning eye look, you need to make sure you have the right tools at hand. Here’s what I recommend:
Eyeshadow palette:
You’ll need a palette with a range of shades to create a multi-dimensional look. Look for one with both matte and shimmer finishes. A palette with neutral shades is ideal for beginners.
To apply and blend your eyeshadow, you’ll need at least two brushes of different sizes. A fluffy blending brush will help you blend your shadows, while a smaller shadow brush is ideal for packing color onto the eyelid.
Eye primer:
Prep your eye with a primer to keep your eyeshadow in place all day and prevent it from creasing. It also helps to enhance the vibrancy of the eyeshadow colors.
Eyeliner:
You can use a pencil, gel, or liquid eyeliner to define your eyes and add some depth. A black or brown liner is ideal for creating a classic look, but you can also opt for colorful liners to add some personality.
Mascara:
No eye look is complete without mascara! Choose a mascara that will volumize and lengthen your lashes without clumping or smudging.
With these basic tools, you’ll be ready to create stunning eye looks that will turn heads.
Step-by-Step Tutorial: Let’s Create Stunning Eye Makeup
Alright, it’s time to get down to business and create some amazing eye makeup! Here’s a step-by-step guide to achieve a stunning look that will have heads turning.
Tip: Before you begin, make sure to wash your face and apply a primer to the eyelids to help your makeup stay put longer.
a. Prep the Eye
First, gather some eye shadow colors that complement each other. You’ll need a light, medium, and dark shade. Begin by applying the lightest shade all over the eyelid and up to the eyebrow bone using a fluffy brush. This will serve as your base.
Pro Tip: To make your eyes look bigger, apply a white or light colored shadow to the inner corners of the eyes.
b. Create the Base
Next, take the medium shade and apply it in the crease of your eyelid using a smaller brush. Blend it outwards to create a subtle gradient. Then, using an even smaller brush, apply the darkest shade to the outer corner of your eye and blend it into the crease.
Tip: Try to create a “winged” effect by applying more of the darker shade towards the outer corner of your eye.
c. Add Dimension
To add dimension, apply a shimmery or glittery shadow to the center of your eyelid, using your finger. This will bring attention to your eyes and give them a pop of shine.
Pro Tip: If you don’t have a shimmery shadow, you can always use a dab of highlighter instead.
d. Finish with Liner and Mascara
Last but not least, it’s time for eyeliner and mascara. Apply a thin line of black eyeliner on your top lash line, starting from the inner corner towards the outer corner. Then, curl your lashes and apply a coat of mascara to both your top and bottom lashes.
Tip: For a bolder look, you can apply false lashes as well.
Tips for Perfecting the Look
– To avoid any fallout from your eye shadow, tap your brush before applying it to your eye.- If you make a mistake with your eyeliner, use a q-tip dipped in makeup remover to fix it.- Use a light hand when applying eyeshadow, as it’s easier to build up color than to remove excess.- Don’t forget to blend! Blending is key for a smooth, seamless look.- Experiment with different colors and techniques to find what works best for you.
Conclusion
Follow this step-by-step tutorial and these expert tips, and you’ll have stunning eye makeup in no time! Remember, practice makes perfect, so don’t be afraid to experiment and have fun with your makeup.
Tips for Perfecting the Look
Hey there, fellow makeup enthusiasts! I’ve been experimenting with eye makeup for years now, and I’ve picked up some tips and tricks along the way to perfecting the ultimate eye look. Here are some expert and uncommon advice to help you step up your eye makeup game!
Blend, Blend, Blend!
One thing that can make or break your eye look is blending. You want your eyeshadow to have a smooth and seamless transition between colors. Avoid harsh lines by using a fluffy blending brush and a light hand. Blend the edges of your eyeshadow until there are no harsh lines, making sure there are no visible lines between two colors. Remember, the key to a perfect eye look is in the blend!
Use Bright Colors Sparingly
Bright colors can be intimidating to use. It’s essential to use them sparingly and apply them to specific areas of the eye. A pop of color can be added to the inner corner, lower lash line, or the center of the lid. A bright blue or purple shade in the crease may seem fun, but it can overwhelm the eye. Bright colors are a great way to add interest and personality to your eye look, but don’t overdo it.
Invest in Good Quality Brushes
Investing in good quality makeup brushes can make a world of difference in your eye makeup application. The right brush can make your job easier, the blending smoother, and the overall result flawless. A small, flat brush is ideal for packing on eyeshadow; a small blending brush to blend in the crease and a fluffy brush for a perfect blend.
Beware of Too Much Sparkle
When it comes to shimmer and glitter, a little goes a long way. Avoid applying shimmery eyeshadow all over the lid; it can age the eye if not applied correctly. Apply it only in specific areas to catch the light, such as the inner corners or the center of the lid. Be sure not to overdo it, as too much sparkle can look unnatural.
Experiment With Different Looks
Lastly, don’t be afraid to step out of your comfort zone and experiment with different eye looks. Playing with different colors, finishes, and shapes can be a fun and creative way to express yourself. Don’t limit yourself to just one style or color; switch it up and have fun with it!
And there you have it, folks! I hope these tips help you on your quest for the perfect eye look. Remember to practice and have fun with it. Happy makeup-ing!
Wrapping it up: Final Thoughts on Achieving the Perfect Smokey Eye
And there you have it! You are now armed with the knowledge and skills to create the perfect smokey eye. Don’t be discouraged if it takes some practice to get it just right – even beauty experts need time to perfect their look.
Remember, preparation is key. It’s essential to properly prep your eye before applying any makeup. Then, creating a base with eyeshadow is crucial to building the perfect foundation for the smokey effect. Adding dimension with darker shades and blending is the trick to achieving a flawless look. Don’t skimp on the liner and mascara – it is the finishing touch that brings the whole look together.
I hope you found my tips and tricks helpful! Remember, there’s no right or wrong way to achieve a smokey eye. Make it your own, experiment with different colors and shapes, and most importantly, have fun with it!
Smokey Eye FAQ
What are the rules for smokey eye?
Making a smokey eye look is all about blending, layering, and using the right products. First things first, choose your eyeshadow colors. Typically, a smokey eye incorporates shades of black, gray, and brown. However, you can also experiment with jewel tones like dark green or navy. Next, start with a neutral base color on your eyelids and blend it into the crease. Then, apply a darker shade to the outer corner of your eye, blending it towards the middle of your lid. Repeat this process with a darker shade until you achieve your desired intensity. To make your smokey eye pop, add a shimmery shade to the inner corner of your eye and below your brow bone. Finally, blend everything together with a clean brush or your fingertip.One important rule to follow when creating a smokey eye is to use a light hand when applying product. It’s easier to add more eyeshadow than it is to take it away. Additionally, make sure to blend thoroughly to avoid any harsh edges.Remember, creating a smokey eye look takes practice, so don’t be afraid to experiment and find what works best for you. Happy blending!
How to make smokey eyes without eyeshadow?
Oh boy, making a smokey eye is no easy feat – it can take a lot of time and effort to get it just right! But if you’re looking to achieve a smokey eye without using eyeshadow, fear not, I’ve got some tips and tricks up my sleeve.Firstly, you should apply a dark eyeliner pencil along your upper lash line and smudge it with a smudging tool or a cotton swab. This will form the base of the smokey eye without requiring any eyeshadow. You can also use a black kohl pencil on your waterline to make your eyes look dramatic and smokey. Next, apply a lighter shade of the same eyeliner pencil to create a gradient effect. Use a light hand and blend well to avoid harsh lines and make it look more blended and natural. Use the same pencil to line your lower lashes and smudge it for a blended effect.Finally, applying mascara is key to finishing off your smokey eye look. It will open up and frame your eyes while making your lashes appear voluminous and full.Well, there you have it, a smokey eye without using eyeshadow! By using these simple tricks and techniques, you can achieve a bold, dramatic and beautiful look that’s sure to turn heads. Good luck and have fun experimenting with your new smokey eyes!
How to do smokey black eyes make up easy?
First things first, when it comes to creating a smokey eye, you need to start with a good base. I like to use a primer to help the eyeshadow blend smoothly and stay in place throughout the day. Then, I apply a neutral base color all over my eyelid. Next, I use a black eyeshadow and apply it to the outer corner of my eye, blending it upwards and outwards towards my crease. I like to use a small blending brush for this.Once I have the black eyeshadow blended to my liking, I use a slightly lighter shade of eyeshadow and blend it over the black to soften the look. This step helps to create the “smokey” effect. I then apply a bit of black eyeliner to my upper lash line and smudge it out using a small brush. This helps to intensify the look and add some depth to the overall look.Finally, I like to finish off the look with a few coats of mascara and some false lashes. This really helps to make my eyes pop and gives me a more dramatic look overall. It may take a bit of practice to perfect your smokey eye look, but it’s definitely worth it. With a little time and effort, you can create a stunning look that’s sure to turn heads. So go ahead and give it a try – you’ve got this!
how to make a smokey eye look?
So you want to know how to make a smokey eye look, huh? Well, let me tell you, it’s all about the blending, girl! Start off by applying a light shade on your lid and then gradually build up the darkness with a darker shade towards the crease. I like to use a small, domed brush for more precision. Now, when it comes to the actual smokey part, grab a dark shade and blend it along your lash line, making sure to keep it nice and tight. Don’t be afraid to bring it a little bit lower than your eye crease for that sultry effect. And remember, you can always add more darkness if needed, but it’s harder to take it away. One tip I’ve learned over the years is to use a pencil brush to smudge out the lower lash line with a dark shade, which will help give that smokey effect. But be careful not to go too heavy-handed! Last but not least, make sure to add some mascara and maybe even some false lashes to really amp up the drama. And voila, you’ve got yourself a smokey eye look that’s sure to turn heads!