Welcome to the masterclass on mascara clumps! You might be asking yourself: what even are clumps? Clumps occur when too much mascara is deposited onto your lashes, creating a bunch of strands that stick together and make ’em look real heavy and thick. These aren’t a good look, so we’re gonna show you how to make sure they don’t happen.
We’re going to start off by looking at what causes clumps in the first place, then tell you how you can store your mascara correctly to prevent ’em, how to apply it without causing clumps, and how to get rid of any pesky clumps if they do crop up. Sounds like a plan? Right – let’s get to it!
Identify Cause of Mascara Clumps
I’m gonna let you in on a little secret: mascara clumps, smudges and flakes ain’t the way to go! So what causes them? Well, there’s a few culprits that could be at fault for your makeup problems.
First up, it could be the formula of your mascara itself. Some formulas are too thick, making it more likely to clump up as you apply. On top of that, old mascaras tend to dry out, so they should be replaced every three months or so if you want to avoid clumps.
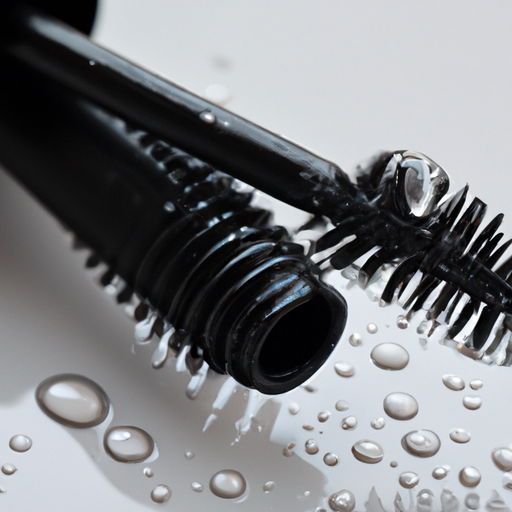
Another issue could be your application technique. Do you use a super long stroke when you put it on? That can cause clumping. And don’t forget about your wand—if it’s been used a ton, the bristles can become matted and uneven, resulting in your mascara coming out lumpy. A clean wand goes a loooong way.

Finally, if you’re using waterproof mascara, you better believe it’ll take some elbow grease to get off come nighttime. Waterproof mascaras cling to your lashes and don’t budge, which can make them look clumpy during the day. Give your lashes a break every once in awhile, and switch it up with a regular formula.
Properly Storing Mascara to Prevent Clumps
Nobody wants clumpy mascara! It’s a total drag, so if you want to avoid it, take the time to store your mascara properly. You might be thinking that throwing it in your bag and dashing out the door is fine – but trust me, it’s not.
First off, keep it away from heat. Prolonged exposure to temperatures over 86 degrees will give you some major goop-iness. So store your tube in a cool, dry place like a medicine cabinet or makeup drawer.
Next up – no dropping. A single fall could cause the formula to separate and create a nasty, sticky mess. So be sure not to get too careless with it – hold on tight!
Finally, never share your mascara. Not only is it unsanitary, but it can also transfer any bacteria to other tubes. Keep your tube just for you – it’ll save you a lot of trouble down the line.
Taking the extra minute or two to stow away your mascara correctly can prevent your daily routine from turning into an utter clump show. Believe me, you don’t have time for that mess. Investing in proper storage now will pay off big time when you swivel your way to sexy, clump-free lashes… no matter how many times you apply!
Tips for Applying Mascara to Avoid Clumps
Applying mascara doesn’t have to be a hassle – follow these tips and you’ll say goodbye to clumps!
First things first, it’s important to get the right kind of mascara. Waterproof mascaras are great for long-lasting effect, but they tend to be more clumpy, so if you’re looking for a fluttery lash look try to find formulas that specify ‘no clumping’ on the pack – these are often creamier in consistency.
It’s also super important to start off with clean lashes. Anything from dust or oil build up can affect your gorgeous end result, so use a gentle cleanser to make sure your canvas is a clean one.
When you’ve got your ideal formula ready to go, apply your mascara using an eyelash curler as a tool. Not only will this give your lashes a boost, but it’ll also help separate them and prevent clumping. Make sure to wiggle the wand at the base of your lashes, then draw it out towards the tip while still holding the ends of the curler.
You can also add extra length and volume to your lashes by layering. After gambling a coat and allowing it to dry, turn your focus to building up the tips of your lashes. Repeat this process until you get the desired effect.
Finally, it’s time for the brush. Before applying any product, run the brush through your lashes gently to remove any excess. Don’t forget to wipe away any droplets that fall on your skin – these can cause clumping if left unattended. Then, simply comb through each eyelash starting with the inner corner and graphic outwards. This’ll help create definition and avoid those pesky clumps.
Ways to Get Rid of Clumps After Application
Ugh, you’ve already put on your mascara and now you realize it looks like a clumpy mess! Don’t worry – this happens to the best of us. Here are some tried-and-true tips for cleaning up your mascara game so you can rock that eye look.
Start by grabbing a spoolie brush or a clean mascara wand and gently comb through your lashes. You don’t want to use too much pressure here, just enough to break up any clumps. This will also help separate your lashes and give them more definition.
If you still have stubborn clumps, take a cotton swab dipped in warm water and lightly press it against the clumps. This should help break them up and soften them so they come off easier. Just make sure you don’t get too close to your eyes with this method!
If all else fails, grab an old (clean!) toothbrush and start brushing! This tends to work better on smaller clumps and is another way to add more definition to your lashes after applying mascara. Make sure to use short strokes and never apply too much pressure.
Finally, if you’re dealing with raccoon eyes, a q-tip dipped in a bit of makeup remover should do the trick. Gently rub the q-tip around the areas where the raccoon eyes are showing up, then go back over it with a dry q-tip. Be careful not to scrub too hard or you could damage your delicate eye area.
With these tips, you’ll be able to get rid of those pesky clumps and finally achieve the perfect mascara look in no time!
Conclusion
Who would’ve guessed that something as simple as mascara could cause so much commotion? Clumpy eyelashes are one of the more annoying beauty blunders and can be a total hassle to fix. Thankfully, though, I’m here to help! By following the tips I provided in this article, you can ensure your mascara stays clump-free from application to storage and everywhere in between. You’re now empowered with the knowledge to always look your best and bat those lashes with confidence!
Removing Mascara Clumps
Why does my mascara look clumpy?
Mascara clumps are usually caused by too much product building up on your mascara wand or by not wiping off the excess product. To avoid getting mascara clumps, make sure to wipe excess product off your wand before applying. Also, use a clean wand each time you apply mascara, as this will help get rid of any buildup of product. If you have already applied mascara and are seeing clumps, try using a Q-tip to gently remove the clumps. This will help you get the look you want without having to start over. Finally, resist the urge to keep adding coats of mascara on top, as this will just make the clumps worse!