Are You Ready to Master the Art of Contouring Makeup?
Hey, beauties! Are you tired of applying makeup without achieving the desired look? Do you want to enhance your facial features and achieve a flawless, sculpted face? Then you’ve come to the right place!
In this guide, I’ll be sharing some expert tips and uncommon advice on how to master the art of contouring makeup. First things first, let’s define what contouring makeup is.
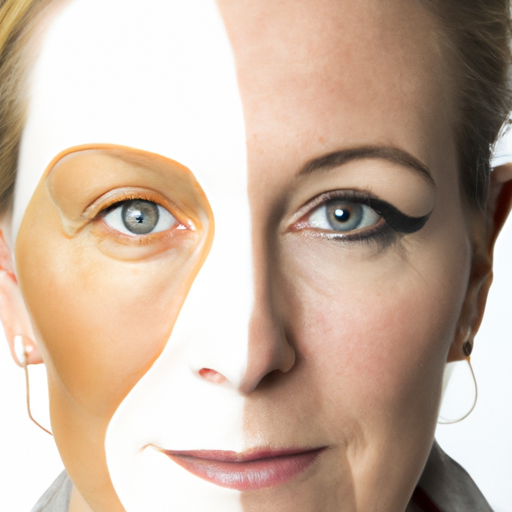
Contouring makeup involves shaping and defining the face using different shades of makeup products. By using darker shades to create shadows and lighter shades to highlight, you can enhance your natural features and sculpt your face to perfection.
By mastering the art of contouring makeup, you can achieve a range of benefits. From enhancing your confidence to creating a flawless look, this skill is definitely worth learning. So, without further ado, let’s dive into the steps you need to follow to achieve a perfectly contoured face!
Step 1: Prepping My Skin Like a Pro
You know what they say, “the foundation of a good contour is good skin prep!” So let’s get started! Firstly, I cleanse my face to ensure that all the dirt and impurities are removed and my skin is squeaky clean. Next, I moisturize my face – this is crucial for achieving a smooth makeup application. I then apply a primer. A primer helps to fill in pores, smooth out lines and wrinkles, and create a base that makes sure your makeup looks smooth and perfect all day long.

Don’t underestimate how important step one is! Skipping or rushing through skin preparation can lead to uneven application or even a cakey makeup look. Take the time to do it right, and you’ll thank yourself later!
Step 2: Choosing the Right Contouring Products
Alright, let’s talk products. This step is crucial to achieving flawless contouring makeup. When it comes to contouring products, there are tons of options out there. From powder to cream to liquid, it can be overwhelming to choose which type is right for you.
Personally, I prefer using cream contour products because they give a more natural finish and blend seamlessly onto my skin. However, this might not be the best option for everyone. It depends on your skin type and the type of finish you’re going for.
Another important factor in choosing the right products is selecting the right colors. The general rule is that contour products should be two shades darker than your skin tone, and highlight products should be two shades lighter. But, of course, this can vary depending on your complexion and personal preferences. Don’t be afraid to test out different shades until you find the perfect match for you.
It’s also important to consider the undertones of the products. Cool-toned products work best for creating shadows and depth, while warm-toned products are great for adding warmth and glow to the skin.
Step 3: Establishing the Basic Shape
Alright, now we’re getting into the real nitty-gritty of contouring makeup! This step is all about establishing the basic shape of your face using different contouring products. Here’s what I do:
Shaping Your Forehead and Temples
I like to start by using a contour powder or cream to shade the sides of my forehead and temples. This helps create the illusion of a narrower forehead and a more defined hairline. I apply the product in a C-shaped motion, using a light hand to build up the color gradually.
Creating Cheekbones and Jawline
Next, it’s time to sculpt those gorgeous cheekbones and chiseled jawline! I use a contouring powder or cream in a darker shade than my skin tone, applying it just below my cheekbones and along my jawline. This helps create the illusion of more defined bone structure.
Defining Your Nose
If you’re like me, you might want to make your nose look a little slimmer or more defined. To do this, I use a contouring powder or cream in a shade slightly darker than my skin tone and apply it down the sides of my nose. Then, I use a small brush or my finger to blend it out so it looks natural.
Remember, the key to establishing the basic shape is to use a light hand and build up the color gradually. It’s much easier to add more product than it is to take it away!
Check out some more tips on contouring makeup here.
Blending and Highlighting: The Art of Creating a Dimensional Look
Now that you have established the basic shape of your face using contouring products, it’s time to blend and highlight. The key to achieving a natural and seamless look is to blend the contouring products well into your skin. To do this, use a damp sponge or brush and blend in outward circular motions until there are no harsh lines. It’s best to start blending from the edges and work your way inwards towards the center.After blending, it’s time to highlight. Use a lighter shade of concealer or foundation on areas of the face that you want to accentuate. Typically, this includes the under-eye area, the center of the forehead, and the center of the chin. Applying highlighter to these areas helps to create a brighter and more youthful look.Remember, less is more when it comes to highlighting. You don’t want your face to look like a shiny disco ball, so don’t go overboard. A little bit of highlighter goes a long way. Take the time to experiment with different shades of concealer or foundation and find the one that works best for your skin type. If you have dry skin, avoid using powder highlighter as it may accentuate dry patches. Instead, opt for cream or liquid highlighter. Lastly, don’t forget to blend again after highlighting to ensure a smooth and even finish. With a little practice, you’ll be able to master the art of blending and highlighting and create a dimensional and flawless look.
Step 5: Finishing Touches
Alright, now that we’ve got the basic shape down and everything is blended seamlessly, it’s time to add those final touches to really make your contour pop! The first thing I always do is set my makeup with powder, to make sure it stays in place all day. I like to use a loose, translucent powder, and I apply it with a big fluffy brush all over my face, focusing on the areas where I’ve applied contour.
After that, it’s time to add some color back into your face. Contouring can make your face look a little flat, so I like to add a bit of blush to the apples of my cheeks to give myself a healthy glow. If I’m feeling fancy, I might even add a bit of highlighter to my cheekbones, the tip of my nose, and my cupid’s bow to really make those areas pop.
Finally, it’s time to finish off your look with your preferred lip color. You might opt for something bold and dramatic, or keep it natural and understated – it’s totally up to you! Personally, I like to keep things simple with a nude or natural-colored lip, but there’s no wrong choice here.
And that’s it – you’ve mastered the art of contouring makeup! Remember, it takes practice to get it just right, so don’t be afraid to experiment and have fun with it. You never know, you might just discover a new favorite look!
Conclusion: Let’s Get Contoured!
Phew, we made it to the end! I hope you’re feeling excited to try out some of these contouring techniques yourself. Remember, mastering the art of contouring makeup takes practice and experimentation. Don’t be afraid to try out different products, colors, and techniques until you find what works best for your unique features and skin tone.As a final reminder, always start with a clean, moisturized, and primed canvas. This will ensure that your contouring makeup goes on smoothly and lasts throughout the day. And don’t forget to blend, blend, blend! The key to a natural-looking contour is seamless blending between light and dark shades.As you continue to experiment with contouring, keep in mind that there are no hard and fast rules. Contouring is all about enhancing and emphasizing your natural features in a way that makes you feel confident and beautiful. So have fun with it, and don’t be afraid to try new things. Who knows, you might just discover a new go-to look for all your special occasions. Happy contouring!