
Get Ready to Slay with a Smokey Eye Look!
Hey there, beautiful! Are you ready to take your eye makeup game to the next level? Then you’ve come to the right place! Today, I’m going to teach you how to create a killer smokey eye look that will turn heads and make you feel like a queen.
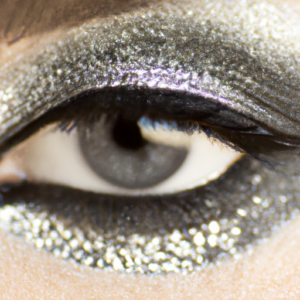
First things first, let’s define what a smokey eye is. It’s a makeup look that involves blending dark eyeshadow hues around the eyes, creating a smoldering effect. The result? A sultry, dramatic makeup look that oozes confidence and sex appeal.
So, why should you try a smokey eye? Well, for starters, it’s a great way to switch up your everyday makeup routine and add some va-va-voom to your look! Plus, it’s versatile. Whether you’re heading to a fancy gala or a casual night out with friends, a smokey eye always looks fashionable and chic.
Getting My Eyes Ready for a Sultry Look
So, you’ve decided to go for the ever-popular smokey eyes! To make sure you get your desired look, you need to prime your eyes well before applying any eyeshadow. I start by gently washing my face and dabbing my eyes dry.
Next, I apply a pea-sized amount of eyeshadow primer to my lids and gently blend it out. This step helps the eyeshadow stay on longer, prevents creasing, and ensures better color payoff.
Now that your lids are smoothened and prepped, it’s time to select the shades of eyeshadow that reflect your smoldering look. I suggest blending at least two or three shades for added depth and dimension.
Up Your Eyeliner Game: Mastering Techniques for a Smokey Eye Look
When it comes to achieving a perfect smokey eye look, eyeliner is a vital element. In this section, I will share some of my favorite eyeliner techniques to create a sultry and smoldering eye look.
Using Gel or Pencil Eyeliner
The first step to creating a smokey eye look is applying eyeliner. Choosing the right type of eyeliner is essential. For a more subtle effect, pencil eyeliner is a good option. It is easy to work with and smudge, making it perfect for blending into a smokey eye. Gel eyeliner, on the other hand, is more precise and lasts longer. If you’re looking for a more dramatic look, then gel eyeliner is the way to go. Just remember to use a brush for application!
Creating a Winged Eyeliner Look
Winged eyeliner has become a staple in the world of makeup, and it’s easy to see why. It elongates and lifts the eyes for a bold and striking look. To create a winged eyeliner look, start by drawing a thin line along the lash line, then create a wing at the outer corner of the eye. The key to a perfect wing is to angle it upward toward the end of the eyebrow. Once you have the outline in place, fill in the wing and connect it to the lash line. Voila! You’ve got a winged eyeliner look that’s sure to turn heads.
Adding Depth with Liquid Eyeliner
If you really want to bring your smokey eye look to life, liquid eyeliner is the way to go. Liquid eyeliner adds depth and definition to the eyes, making them appear more prominent. To apply liquid eyeliner, start at the inner corner of the eye and draw a thin line along the lash line. As you reach the outer corner of the eye, gradually increase the width of the line for a winged effect. Because liquid eyeliner can be tricky to master, it’s essential to invest in a high-quality product and practice regularly.
With these techniques, you’ll be well on your way to achieving a flawless smokey eye look that’s sure to impress. Don’t be afraid to experiment and find what works best for you. Remember, practice makes perfect.
Finishing Touches: Completing the Sultry Smokey Eye Look
Now that we have applied the eyeshadow and eyeliner, let’s focus on the finishing touches that will give your eyes that sultry and mesmerizing look.
The first thing to do is to apply mascara. This will not only make your lashes look longer and fuller but also enhance the overall look. Start by curling your lashes with an eyelash curler, then apply mascara from the roots of the lashes to the tips. Wiggle the brush back and forth as you apply the mascara to avoid clumps.
After applying mascara, it’s time to set the look with a makeup setting spray. This will help lock in the eyeshadow, eyeliner, and mascara, ensuring that they stay put throughout the day or night. Hold the spray at arm’s length and spray it evenly across your face. Avoid touching your face for a few seconds until the spray dries.
The final step is to check for any mistakes or smudges and fix them. Use a cotton swab dipped in makeup remover or micellar water to remove any unwanted smudges or mistakes. You can also use a clean brush or your fingertips to blend and smoothen out any harsh lines.
And there you have it, your perfect smokey eye look is complete! Don’t be afraid to experiment with different eyeshadow shades and eyeliner techniques to find the perfect combination that suits you.
Conclusion: Time to Smoke Out Those Eyes, Girl!
Well, well, well, you made it to the end of this Smokey Eye tutorial. Congratulations! I hope you learned a thing or two about achieving some killer Smokey Eye results. Remember, practice makes perfect so don’t be deterred if you don’t master it the first time. This look is all about experimentation and finding what works best for you.
Don’t be afraid to try out different eyeshadow shades and play around with your eyeliner to see what techniques give your eyes the ultimate pop. Oh, and don’t worry about finding the perfect eyeliner for your eye shape – we’ve got the perfect resource for that! Check out this comprehensive guide from besteyelashextensionsupplies.com.
And there you have it, my lovelies! With a little bit of practice, some great makeup products, and this handy guide, you’ll be rocking that Smokey Eye look like a pro in no time. So go on, smoke out those eyes, and let that inner glamazon shine through!