Short Lashes – What a Drag!
Hey there, lashes lovers! If you’re like me and have shorter lashes, you know the struggle is real. It’s frustrating when you see those long, fluttery lashes on others and wonder why yours can’t be the same. But fear not! I’ve got some fantastic tips to help you make the most out of your lashes and achieve that mesmerizing look you’ve always dreamed of. So put on your mascara capes, ladies and gents, and let’s dive into this lash journey together!
Now, before we get into the nitty-gritty tips, let’s define what short lashes actually are. Short lashes are those lovely little hairs that sit close to your eyelid, refusing to reach majestic lengths. It’s like they’ve got a mind of their own, right? But worry not, because there are ways to enhance, lengthen, and volumize them for that instant wow factor!
So why bother applying mascara on short lashes? Well, my friend, let me enlighten you. Mascara is like a magic wand for our lashes. It instantly transforms them from ho-hum to va-va-voom, giving you that wide-eyed, awake look. Not only does mascara give your lashes the appearance of length and volume, it also adds definition, making your eyes pop and drawing attention to your beautiful peepers. It’s like a mini confidence boost in a tube!
Now, hold on to your mascara wands and get ready for some seriously useful tips to enhance those short lashes. But before we start, you can find more expert advice on this topic here if you’re hungry for more lash knowledge!
Step-by-Step Guide
Alright, let’s get into the nitty-gritty of how to make those short lashes pop! Follow along with me as we go through each step to achieve maximum lash length and volume.
Prep Your Lashes: Before diving into the world of mascara, make sure your lashes are clean and free from any leftover makeup. A gentle swipe of makeup remover or micellar water should do the trick.
Pick the Right Mascara Formula and Wand Shape: Now, here’s where the real magic happens. Take a moment to find the perfect mascara for your lashes. Look for a formula that adds length and volume without clumping. As for the wand, opt for a shape that suits your needs. Some like straight wands for precision, while others prefer curved ones for that extra lift.
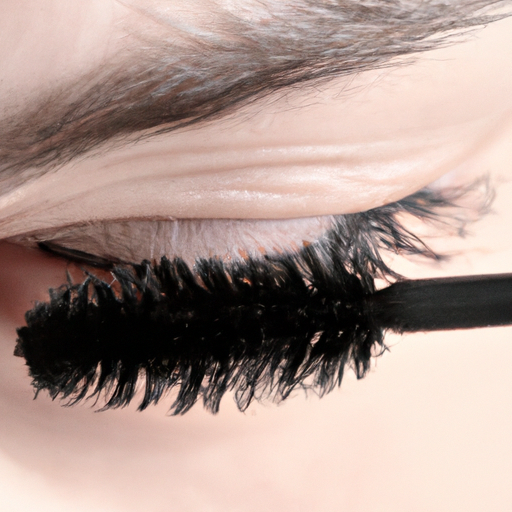
Start at the Base of Your Lashes: Grab that mascara wand and position it at the root of your lashes. Gently wiggle the wand from side to side as you move upwards. This will help the product evenly coat each lash and create a voluminous effect.
Wiggle the Wand as You Move Up: As you continue applying the mascara, remember to wiggle the wand slightly from the base to the tips of your lashes. This will ensure that every lash gets some love and prevents clumps from forming.
Apply Mascara to the Lower Lashes: Don’t forget about those bottom lashes! Use a lighter hand and delicately swipe the wand across your lower lashes. This will add balance and definition to your overall lash look.
Comb Lashes with a Spoolie Brush: Now, here’s a little trick to prevent any clumps or spider-leg effect. Take a clean spoolie brush and gently comb through your lashes after each coat of mascara. This will separate and define each lash, leaving you with a fluttery, natural look.
Add More Coats if Desired: If you’re looking for some extra drama, don’t be afraid to layer on another coat or two of mascara. Just remember to let each coat dry for a few seconds before applying the next one. This will prevent the dreaded clumpy mess.
There you have it, my friends! Follow these simple steps, and you’ll be batting those lashes in no time. Remember, finding the right mascara and technique may take a bit of practice, so don’t be discouraged if it doesn’t happen overnight. Experimentation is key, and I have no doubt you’ll figure out what works best for your unique lashes. So go ahead, have fun, and let your lashes steal the show!
Conclusion: My Final Thoughts
Alrighty then, we’ve made it to the end! Now that we’ve gone through all the steps, let’s do a quick recap, shall we? So, first off, we talked about what short lashes are, those little babies that might need a bit of a boost. Then, we delved into the wonderful benefits of applying mascara on those lovely lashes – think volume, length, and that captivating eye-popping effect!
Now, it’s time to put our newfound knowledge into action with our step-by-step guide. Prepping those lashes is key, my friends. Clean ’em up, curl ’em if you want, and make sure they’re primed to perfection. Choose the right mascara formula and wand shape, ‘coz that’s gonna make a world of difference in how your lashes turn out.
When it’s time to apply the mascara, start at the base and wiggle that wand as you move up. Don’t forget about those lower lashes too – give ’em some love! And once you’ve coated those lashes to your heart’s content, grab a handy spoolie brush and comb through ’em for that perfectly separated look.
But hold on, we’re not done just yet! If you want some extra oomph, go ahead and add more coats of mascara. Remember, practice makes perfect, so don’t be afraid to experiment and find what works best for you. Now, I can’t stress this enough, folks – having the right equipment is essential to achieve those gorgeous lashes you desire. So invest in some good quality mascaras and tools, and trust me, it’ll be worth every penny.
So, here’s my final piece of advice – practice, practice, practice! Don’t get discouraged if you don’t nail it on your first try. It takes time to perfect the art of mascara application. Whether it’s for a casual day out or a glam night on the town, your lashes can be the star of the show. So go on, give it a whirl, and let your beautiful lashes take center stage!