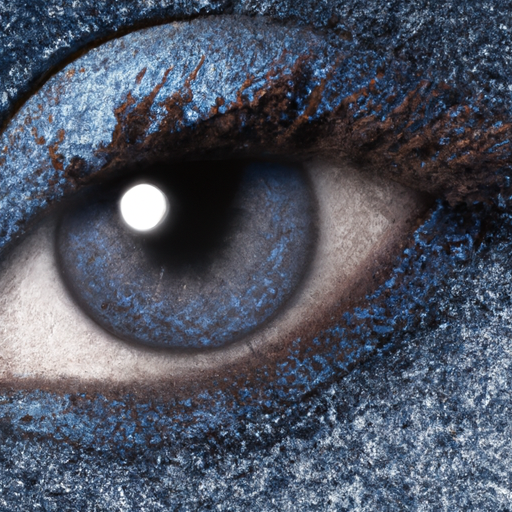
Let’s Smoke It Up: The Iconic Smoky Eye Look
Hey there makeup mavens! Are you ready to turn heads and make a statement with your eyes? Look no further than the smoky eye look. This dramatic and sultry makeup style has been a go-to for generations of women, and for good reason. It’s bold, it’s mysterious, and it’s absolutely iconic.
If you’re new to the world of smoky eyes, don’t worry. With a bit of practice and the right tools, anyone can master this look. In this article, I’ll be walking you through the step-by-step process of creating the perfect smoky eye, from preparation to finish. But be warned: once you’ve mastered this look, you might never want to go back.
Before we dive in, I should note that the supplies and techniques I’ll be discussing are just one approach to creating a smoky eye. Everyone has their own preferences and creative style, so feel free to experiment and find what works best for you. For additional tips on bold makeup looks, check out this article on creating a dramatic look with makeup.
Get Ready for the Smoky Eye Look
Before we start with the fun part, let’s make sure we have everything we need to rock that smoky eye look. Here’s what you’re going to need:
- Primer
- Eyeshadow palette
- Eye pencil
- Mascara
- Brush set
Now, I know what you might be thinking, “What do I need all this for?” Trust me, every product counts when it comes to achieving that smoky eye perfection.

First up, primer. Applying primer on your lids before you start with your eyeshadow is essential to make it last longer and blend seamlessly. Don’t skip this step!
You’re also going to need a variety of eyeshadows in different shades to create the depth and dimension of the smoky eye. Make sure to have at least two dark shades and one light shade in your palette.
Next, an eye pencil will be your best friend when it comes to defining your lash lines and creating that sultry, smoky effect. And of course, we can’t forget mascara to finish off your look and make your eyes pop!
Last but not least, you need a good brush set to help you create the perfect blend and smudge.
So go ahead and gather all your supplies before you begin, and let’s get smokey!
The Perfect Smoky Eye Look: Step-By-Step Instructions
Okay, now that we’ve got our prep down, let’s get started on creating the perfect smoky eye look!
Step 1: Apply primer
This is always the first step in any eye makeup routine. Using a primer ensures that your eyeshadow will last longer and remain crease-free throughout the day. Simply dab a small amount onto your eyelids and blend it in with your fingertips or a brush.
Step 2: Create the base with a light eyeshadow
Choose a light-colored eyeshadow and apply it all over your eyelids with a brush. This will serve as your base and will make it easier to blend in the darker colors later on.
Step 3: Darken the crease with a medium color
With a slightly darker shade, create definition by applying it to the crease of your eyelids. Sweep back and forth with a brush to blend it in well.
Step 4: Add depth and definition to the outer corner with a dark shade
Use a dark eyeshadow to create a V-shape at the outer corner of your eyes. This will give your eyes a dramatic and smoky effect. Blend it in with a fluffy brush to avoid any harsh lines.
Step 5: Line the top and bottom lash lines with an eye pencil
Choose a dark eye pencil and apply it to your top and bottom lash lines. This will create a bold and intense look.
Step 6: Blend out the pencil line with eyeshadow
Using a small brush, smudge the eye pencil line with an eyeshadow. This will give it a softer look and help blend it in with the eyeshadow on your lids.
Step 7: Smudge and add drama with a black eyeshadow
For an even more intense look, use a black eyeshadow to deepen the outer corner and crease. Be careful not to go overboard – start with a little bit of shadow and build it up gradually for the desired effect.
Step 8: Finish with mascara
Finally, apply a few coats of mascara to your top and bottom lashes to complete the smoky eye look!
Remember, these steps may take some practice, but with a little patience and some creativity, you can perfect this iconic makeup look. Happy glamming!
Tips & Tricks to Master the Iconic Smoky Eye Look
Are you tired of trying and failing at achieving the perfect smoky eye look? Well, fear not my lovelies! As a seasoned makeup artist, I have some tips and tricks up my sleeve to help you slay this iconic look like a pro!
Use a Flat Brush for Precise Application
One of the keys to achieving a flawless smoky eye look is using the right tools. A flat brush is essential for precise application and creating clean lines. It will also help you pack on the eyeshadow without making a mess.
Layer the Shadows for More Intensity
A smoky eye look is all about depth and intensity. To achieve this, you need to layer different shades of eyeshadow. Start with a light color as a base, then gradually build up to a darker shade. This will create a seamless transition and add dimension to your eyes.
Don’t Forget to Blend!
Blending is the secret to a perfect smoky eye look. You don’t want harsh lines or patchy eyeshadow. Use a clean, fluffy brush to blend out the edges and create a smooth gradient. This will give you that sexy and sultry smoky eye look.
Start With Less Product and Build Up Gradually
Less is sometimes more, especially when it comes to makeup. Start with a small amount of product and build up gradually. This will give you more control over the final outcome and prevent you from going overboard with the eyeshadow.
Use Black Eyeshadow to Add Drama
If you really want to take your smoky eye look to the next level, use a black eyeshadow to add drama and intensity to the outer corner of your eyes. This will make your eyes pop and turn heads wherever you go!
By following these simple tips and tricks, you’ll be able to master the iconic smoky eye look in no time. Remember, practice makes perfect, so keep experimenting until you find the right technique that works for you. Happy smoky eye-ing, my darlings!
That’s how you rock the smoky eye look, baby!
Alright, ladies and gents, we’ve reached the end of our tutorial on how to create the iconic smoky eye look. I hope you’ve learned a thing or two and are eager to put your skills to the test. Remember, practice makes perfect — it may take a few tries to nail the technique, but once you do, you’ll be turning heads left and right. To summarize the steps, start by applying a primer to your eyelids to ensure your eyeshadow stays in place. Then, create the base with a light eyeshadow and darken the crease with a medium shade. Add depth and definition to the outer corner with a dark shadow. Don’t forget to line your top and bottom lash lines with an eye pencil and blend out the line with eyeshadow. Smudge and add drama with a black eyeshadow and finish with mascara. As for tips and tricks, remember to use a flat brush for precise application, layer the shadows for more intensity, start with less product and build up gradually, and don’t forget to blend! With a little practice, you’ll be a smoky eye pro in no time. So there you have it, folks. I hope you’ve enjoyed this tutorial and feel inspired to try out the smoky eye look for yourself. As always, have fun with your makeup and rock it with confidence!