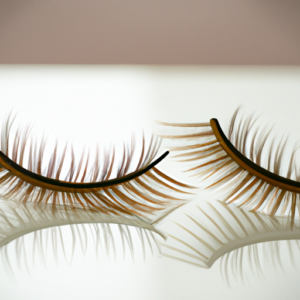
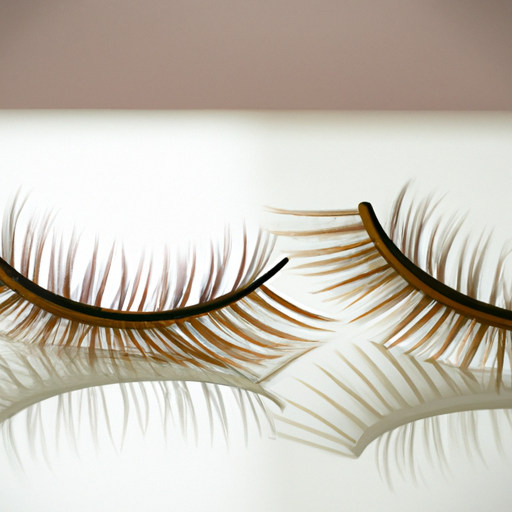
Individual eyelashes can really help to make your eyes pop! With the right preparation and technique, it’s easier than you might expect to achieve a natural, beautiful look with false lashes. In this blog post, I’m gonna walk you through the process from start to finish and even let you in on some of my pro-tips.
Let’s jump right into it. First, you need to get your natural lashes ready for falsies. That means cleaning them thoroughly with a gentle cleanser, and finishing off with an eyelash primer that’ll help the glue stick better. Then, you need to choose the right length and volume for your individual lashes – don’t be afraid to experiment until you get the perfect shape for your face!
Next up? Applying that lash glue. Make sure to use a good quality (waterproof!) glue specifically designed for false eyelashes, and give it time to set before you snap those individual lashes onto your lids. When they’re on, take some time to blend them in with your natural lashes using an eyelash curler and mascara. If all goes well you should have that gorgeous, wispy look you’ve been dreaming of.
Prepping Your Lashes
When you want to look your absolute best, prepping your lashes is key. From cleaning them up to using the right primer and glue, there’s a lot that goes into achieving that perfect set of falsies. Here’s my insider tips for making your individual eyelashes look flawless.
Let’s start with cleaning off your natural lashes. Before applying any product, use a Q-tip and some micellar water to remove any dirt, excess oil, and makeup from around the eyes. If you don’t have micellar water handy, baby shampoo or mild facial cleanser can work in a pinch — just be sure to rinse thoroughly afterwards! You don’t want to end up with irritated skin.

Once your lids are squeaky clean, you’ll want to apply a lash primer. Primers help condition the natural lashes, as well as provide a better grip for the false ones. When choosing a primer, opt for one that’s specifically formulated for individual lashes – it’s stronger but still gentle enough not to damage your real ones.
Application
Ah, application of individual eyelashes. This is where the nitty gritty starts to take shape and come to life. Here’s how ya do it!
First, ya gotta decide what type of lash you wanna go with and get the right fit for YOU. Longer lengths and fuller volumes look great, but if it’s your first time, keep it a bit more conservative. Got that dialed in? Perfect!
Next up, you gotta use a good quality lash glue, stick with clear stuff if ya can swing it. It’ll be easier to apply and can save ya time. Once ya got your products sussed out, start applying!
Get your mirror set up nice so godshine can light up yo’ face. I find it helps to hold the lashes up to yer eyelid for a sec to make sure it ain’t too long or short. Then, dip the band in the glue, wait a few seconds until it’s tacky… and place it on your lid near the base of your natural lashes, gently pressing onto the skin.
Just like that, you’re done and ready to rock and roll. Just remember not to get all carried away – you want these babies to blend in nice, don’t want ‘em looking too obvious.
Finishing Touch
Once you’ve applied the false eyelashes, it’s time to give ’em the finishing touch. This is when it all comes together—so don’t rush. These steps are gonna make sure your lashes look pristine and natural!
First off, blend your false eyelashes with your natural ones. You want them to look seamlessly integrated. Then curl both sets of lashes, gettin’ ’em nice and perky. Combining the two sets of lashes will also help make them look like one cohesive unit.
Having a steady hand, and some patience, will go a long way in achieving that seamless look. And don’t forget a light coat of mascara to really marry the two together. Not too much, though. If you over-apply the mascara, it’ll just look clumpy and fake.
And there ya have it—all finished and ready to hit the town! With these tips, you’re sure to have the lushest lashes around and rock out a stunning look in no time!
Conclusion
Hey there – let’s wrap things up! Applying individual eyelashes can be a great way to add that extra oomph to your look. It takes some practice, but with a few tricks of the trade, it’s totally doable for most folks. Here are a few takeaways to consider.
Benefits of Applying False Lashes: There are tons of reasons why you might want to put on fake lashes—from full-on glam looks to subtly enhancing your naturally beautiful eyes. Whatever your reason, it helps to give your face dimension and create an overall softer effect that’ll turn heads on the dance floor or in the boardroom.
Tips for Long-lasting Results: Everyone wants their lashes to stay on for as long as possible. To make sure they last, use a good quality lash primer before applying the lash glue. This helps prep the natural lash so the false lash will stick better. Also, using a thin strip of eyeliner along the lash line makes it look more natural and seamless. Finally, avoid using too much oil-based makeup, since this can break down the adhesive over time.
There ya have it – some real talk on achieving your desired look with individual eyelashes. Get ready to bat those luscious lashes and dazzle ’em all!
Eyelash Application Q&A
How can I make my eyelashes look like falsies naturally?
I’ve been asked by many people how to apply individual eyelashes that look natural. Well, I’m no beauty expert, but I’m confident I can provide some valuable insight. The key is to apply the lashes in a way that blends with your natural lashes, so that it looks like you have one seamless line of lashes. Here’s how I do it:
First, I use tweezers to carefully pick up each false lash and bring it to my eyelid. I like to apply the lashes directly to my lid, instead of the lash band. This helps the false lash blend in more seamlessly. Make sure to keep the lashes as close to your lash line as possible for a natural look. I also make sure to line up the inner and outer corners after the lash is applied.
Next, I use a thin layer of eyelash glue, applied directly to the false lash. You don’t want too much glue – a little goes a long way and too much glue can make the lash look heavy and unnatural. I like to concentrate the glue on the band of the lash, near the root, then let it sit for a minute to dry.
Finally, I use my tweezers to press the false lash onto my lash line. I use a gentle pressing motion, making sure to press the false lash close to my natural lashes. This helps them blend together more seamlessly and gives the illusion of a single lash line.
Following these steps, my individual eyelashes look convincingly natural. With a bit of patience and the right technique, you’ll be able to perfect the art of applying individual false lashes that look like your own!
Do you apply individual lashes to the skin?
Applying individual lashes isn’t as difficult as it seems. With a little bit of practice and patience, you can get the perfect look you’re going for. Here are a few tips to help make your lashes look more natural.
First, start with clean eyelids. Make sure to remove any makeup, oils, and dirt before getting started. Choose a lash style and color that will look natural on your eyes, and be sure to use a quality lash adhesive.
When applying, start at the outer corner of your eye and work your way in. Don’t be tempted to apply too many lashes, as this can look unnatural. You want them to look natural and effortless, so be sure to take your time and apply sparingly. Working from the center of the eye outward can also create a more natural look.
Next, curl the lashes with an eyelash curler to help them blend with your real lashes. Be sure to let the adhesive set for a few seconds before pressing the false lashes down. Once they’re in place, use a small brush to blend the individual lashes with your natural ones.
Finally, finish off the look with a coat of mascara. This will help to blend the individual lashes with your natural ones and give your eyes a more natural look. And voila! You’re done!
How should individual lashes be applied?
The key to achieving a natural look with individual eyelashes is to focus on technique and accuracy. First, I’d recommend pre-curling your natural lashes for a better hold. Then, pick individual lashes that are similar in length and thickness to your own and apply a thin layer of adhesive to the lash band. Make sure the adhesive isn’t too wet when you’re ready to apply. Once you’ve got the adhesive on the lash, begin your lash application by placing the lash as close to your lash line as possible. I’d suggest tweezing the individual lashes to get rid of any excess and trimming the ends to fit the shape of your eye. Finally, use a spoolie brush to blend your real and fake lashes together for an even more natural look!
